OS X 下安装 GPU 版本的 TensorFlow

什么是TensorFlow

TensorFlow是Google发布的第二代深度学习系统。TensorFlow 顾名思义,tensor就是张量,即类型化的多元数组,flow取自data flow graph(数据流图)。图中的每个节点(node)为数学运算,图的边(edge)是数据流,即前面提到的张量(tensor)。这种结构可以让你很容易地将计算任务分发到不同的设备中。
Tensorflow 支持C,C++,Python。目前 Python 的库最为易用,所以 Python 是我们实践 TensorFlow 的首选。目前TensorFlow(r0.9,2016-7-21)官方有Linux下的CPU、GPU支持,OS X下的CPU支持,还有Android支持。TensorFlow的GPU支持是基于CUDA的,这意味着你的机器必须有N卡才可以启用GPU支持。我的机器是2012中的Macbook Pro,带一块儿NVIDIA GeForce GT 650M。然而官方OS X并不带GPU支持,要实现这个功能需要自己编译。本文就将介绍我编译OS X下带GPU支持的TensorFlow的一些经验。

步骤

这篇文章主要参考了
[https://docs.google.com/document/d/1f0y8t28c\_VltOx4mZDSUCozuAslejT4f\_QlATKX82Uw/edit]

推荐使用Python3

1.检查机器是否有Nvidia的GPU

这一步很简单,在系统报告里就可以看到。不太确定外置的eGPU是否可用,没有测试。

2.编译Tensorflow的pip package

首先安装 Homebrew:

1
/usr/bin/ruby -e "$(curl -fsSL https://raw.githubusercontent.com/Homebrew/install/master/install)"

使用brew安装bazel和swig:

1
brew install bazel swig

安装python的six、numpy和wheel:

six

1
sudo pip install six

numpy

1
sudo pip install numpy

wheel

1
sudo pip install wheel

安装ipyhton

1
sudo pip install python

如果你使用了Anaconda python,以上两步都可以省略

安装coreutils

1
brew install coreutils

安装 CUDA Toolkit

1
2
brew tap caskroom/cask
brew cask install cuda

将CUDA目录添加到路径中(以bash为例)

1
2
3
4
5
vi ~/.bash_profile
export CUDA_HOME=/usr/local/cuda
export DYLD_LIBRARY_PATH="$DYLD_LIBRARY_PATH:$CUDA_HOME/lib"
export PATH="$CUDA_HOME/bin:$PATH"

安装CUDA的深度神经网络库(cuDNN)

这步需要先注册Nvidia的Accelerated Computing Developer Program, 注册地址为[https://developer.nvidia.com/accelerated-computing-developer]。注册好之后,我们需要下载cuDNN v5.1 RC (June 16, 2016), for CUDA 7.5(这里因为brew默认安装的是7.5版本的CUDA,所以需要下载对应版本的cuDNN)。下载好之后,解压、并将相应文件转移到cud目录中。

1
2
3
sudo mv include/cudnn.h /Developer/NVIDIA/CUDA-7.5/include/
sudo mv lib/libcudnn /Developer/NVIDIA/CUDA-7.5/lib
sudo ln -s /Developer/NVIDIA/CUDA-7.5/lib/libcudnn /usr/local/cuda/lib/

下载Tensorflow源码(v0.90rc0)

1
git clone --branch v0.9.0rc0 --single-branch https://github.com/tensorflow/tensorflow

查看你的GPU是否支持CUDA

https://developer.nvidia.com/cuda-gpus

编译

1
2
cd tensorflow
./configure

按照以下选项进行配置:

1
2
3
4
5
6
7
8
9
10
11
12
13
Please specify the location of python. [Default is /usr/bin/python]:
Do you wish to build TensorFlow with Google Cloud Platform support? [y/N] N
No Google Cloud Platform support will be enabled for TensorFlow
Do you wish to build TensorFlow with GPU support? [y/N] y
GPU support will be enabled for TensorFlow
Please specify which gcc nvcc should use as the host compiler. [Default is /usr/bin/gcc]:
Please specify the Cuda SDK version you want to use, e.g. 7.0. [Leave empty to use system default]: 7.5
Please specify the location where CUDA 7.5 toolkit is installed. Refer to README.md for more details. [Default is /usr/local/cuda]:
Please specify the Cudnn version you want to use. [Leave empty to use system default]: 5
Please specify the location where cuDNN 5 library is installed. Refer to README.md for more details. [Default is /usr/local/cuda]:
Please specify a list of comma-separated Cuda compute capabilities you want to build with. 3.0
You can find the compute capability of your device at: https://developer.nvidia.com/cuda-gpus.
Please note that each additional compute capability significantly increases your build time and binary size.

配置好之后进行编译:

1
2
bazel build -c opt --config=cuda //tensorflow/tools/pip_package:build_pip_package
bazel-bin/tensorflow/tools/pip_package/build_pip_package /tmp/tensorflow_pkg

安装编译好的package

1
sudo pip install /tmp/tensorflow_pkg/tensorflow-0.9.0-py2-none-any.whl

测试

如果以上步骤一切顺利,我们可以进行下一步测试了。
新建一个python文件:

1
vim test.py

以下为一个求矩阵乘积的程序:

1
2
3
4
5
6
7
8
9
10
11
12
import tensorflow as tf
# Creates a graph.
a = tf.constant([1.0, 2.0, 3.0, 4.0, 5.0, 6.0], shape=[2, 3], name='a')
b = tf.constant([1.0, 2.0, 3.0, 4.0, 5.0, 6.0], shape=[3, 2], name='b')
c = tf.matmul(a, b)
# Creates a session with log_device_placement set to True.
sess = tf.Session(config=tf.ConfigProto(log_device_placement=True))
# Runs the op.
print(sess.run(c))

运行:

1
python test.py

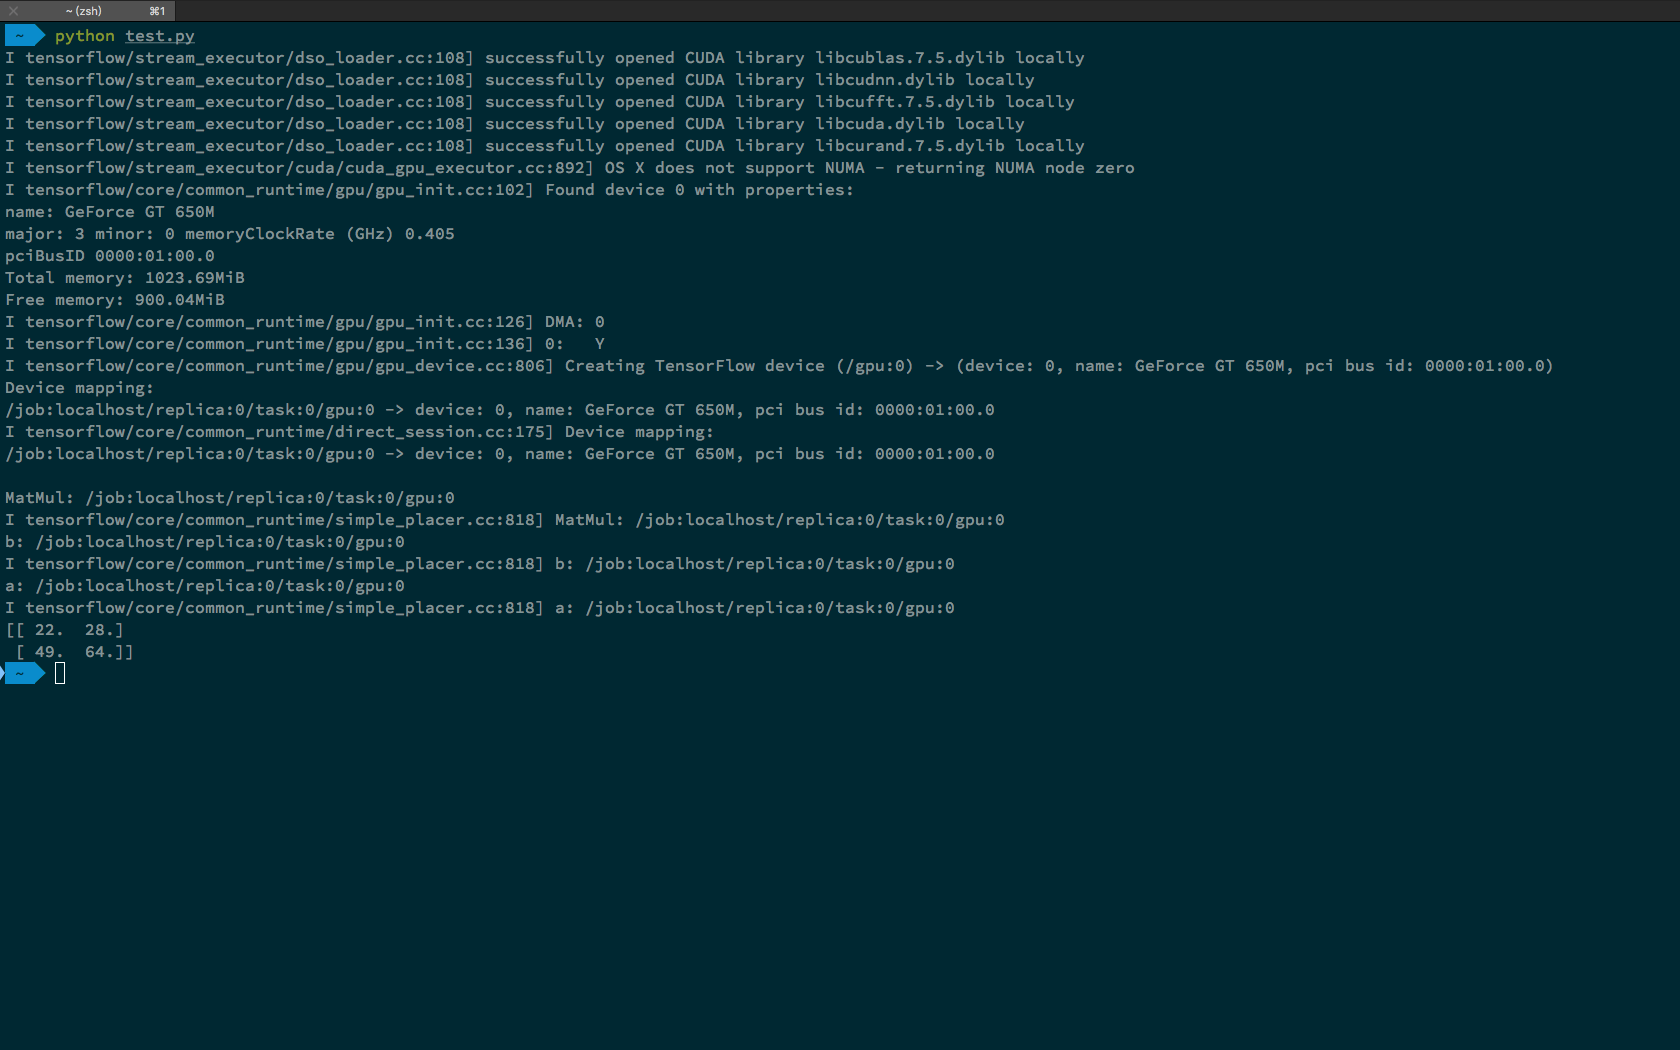
如果看到以下结果,说明可以正常使用了,enjoy!
测试成功